Amazon

Sunday, August 18, 2024

A Beginner Videographer’s Guide to the Best Lavalier Microphones


A lavalier microphone

Embarking on a journey in videography can be thrilling yet daunting, especially when you realize sound quality can make or break your projects. That's where lavalier microphones, more affectionately known as "lav mics," come into play. Small, discreet, but mighty in performance, they're perfect for interviews, documentaries, vlogs, and more. We've rounded up the best lav mics suited for beginner videographers, exploring their features, advantages, and disadvantages.


1. Rode SmartLav+


SmartLav+


The Rode SmartLav+ is designed for many setups, including smartphones, making it one of the most versatile lav mics for beginners. Its omnidirectional condenser capsule captures the sound equally from all directions, ensuring clear and natural audio.


Advantages:

Thanks to its TRRS connector, high-quality sound reproduction, and relatively affordable price, it is compatible with a wide range of devices.


Disadvantages:

It requires an adapter (sold separately) for specific cameras and audio recorders. 


2. BOYA BY-M1


https://m.media-amazon.com/images/I/71RlyKGrMBL._AC_SL1500_.jpg


The BOYA BY-M1 is an excellent budget-friendly option. It offers decent sound quality and is battery-powered, allowing it to be used with cameras, smartphones, and PCs.


Advantages:

It is highly affordable, includes a lapel clip and windscreen, and offers a long cable for flexibility in shooting setups.


Disadvantages:

Sound quality may not match up to more expensive models, and the built-in battery requires occasional replacement. 


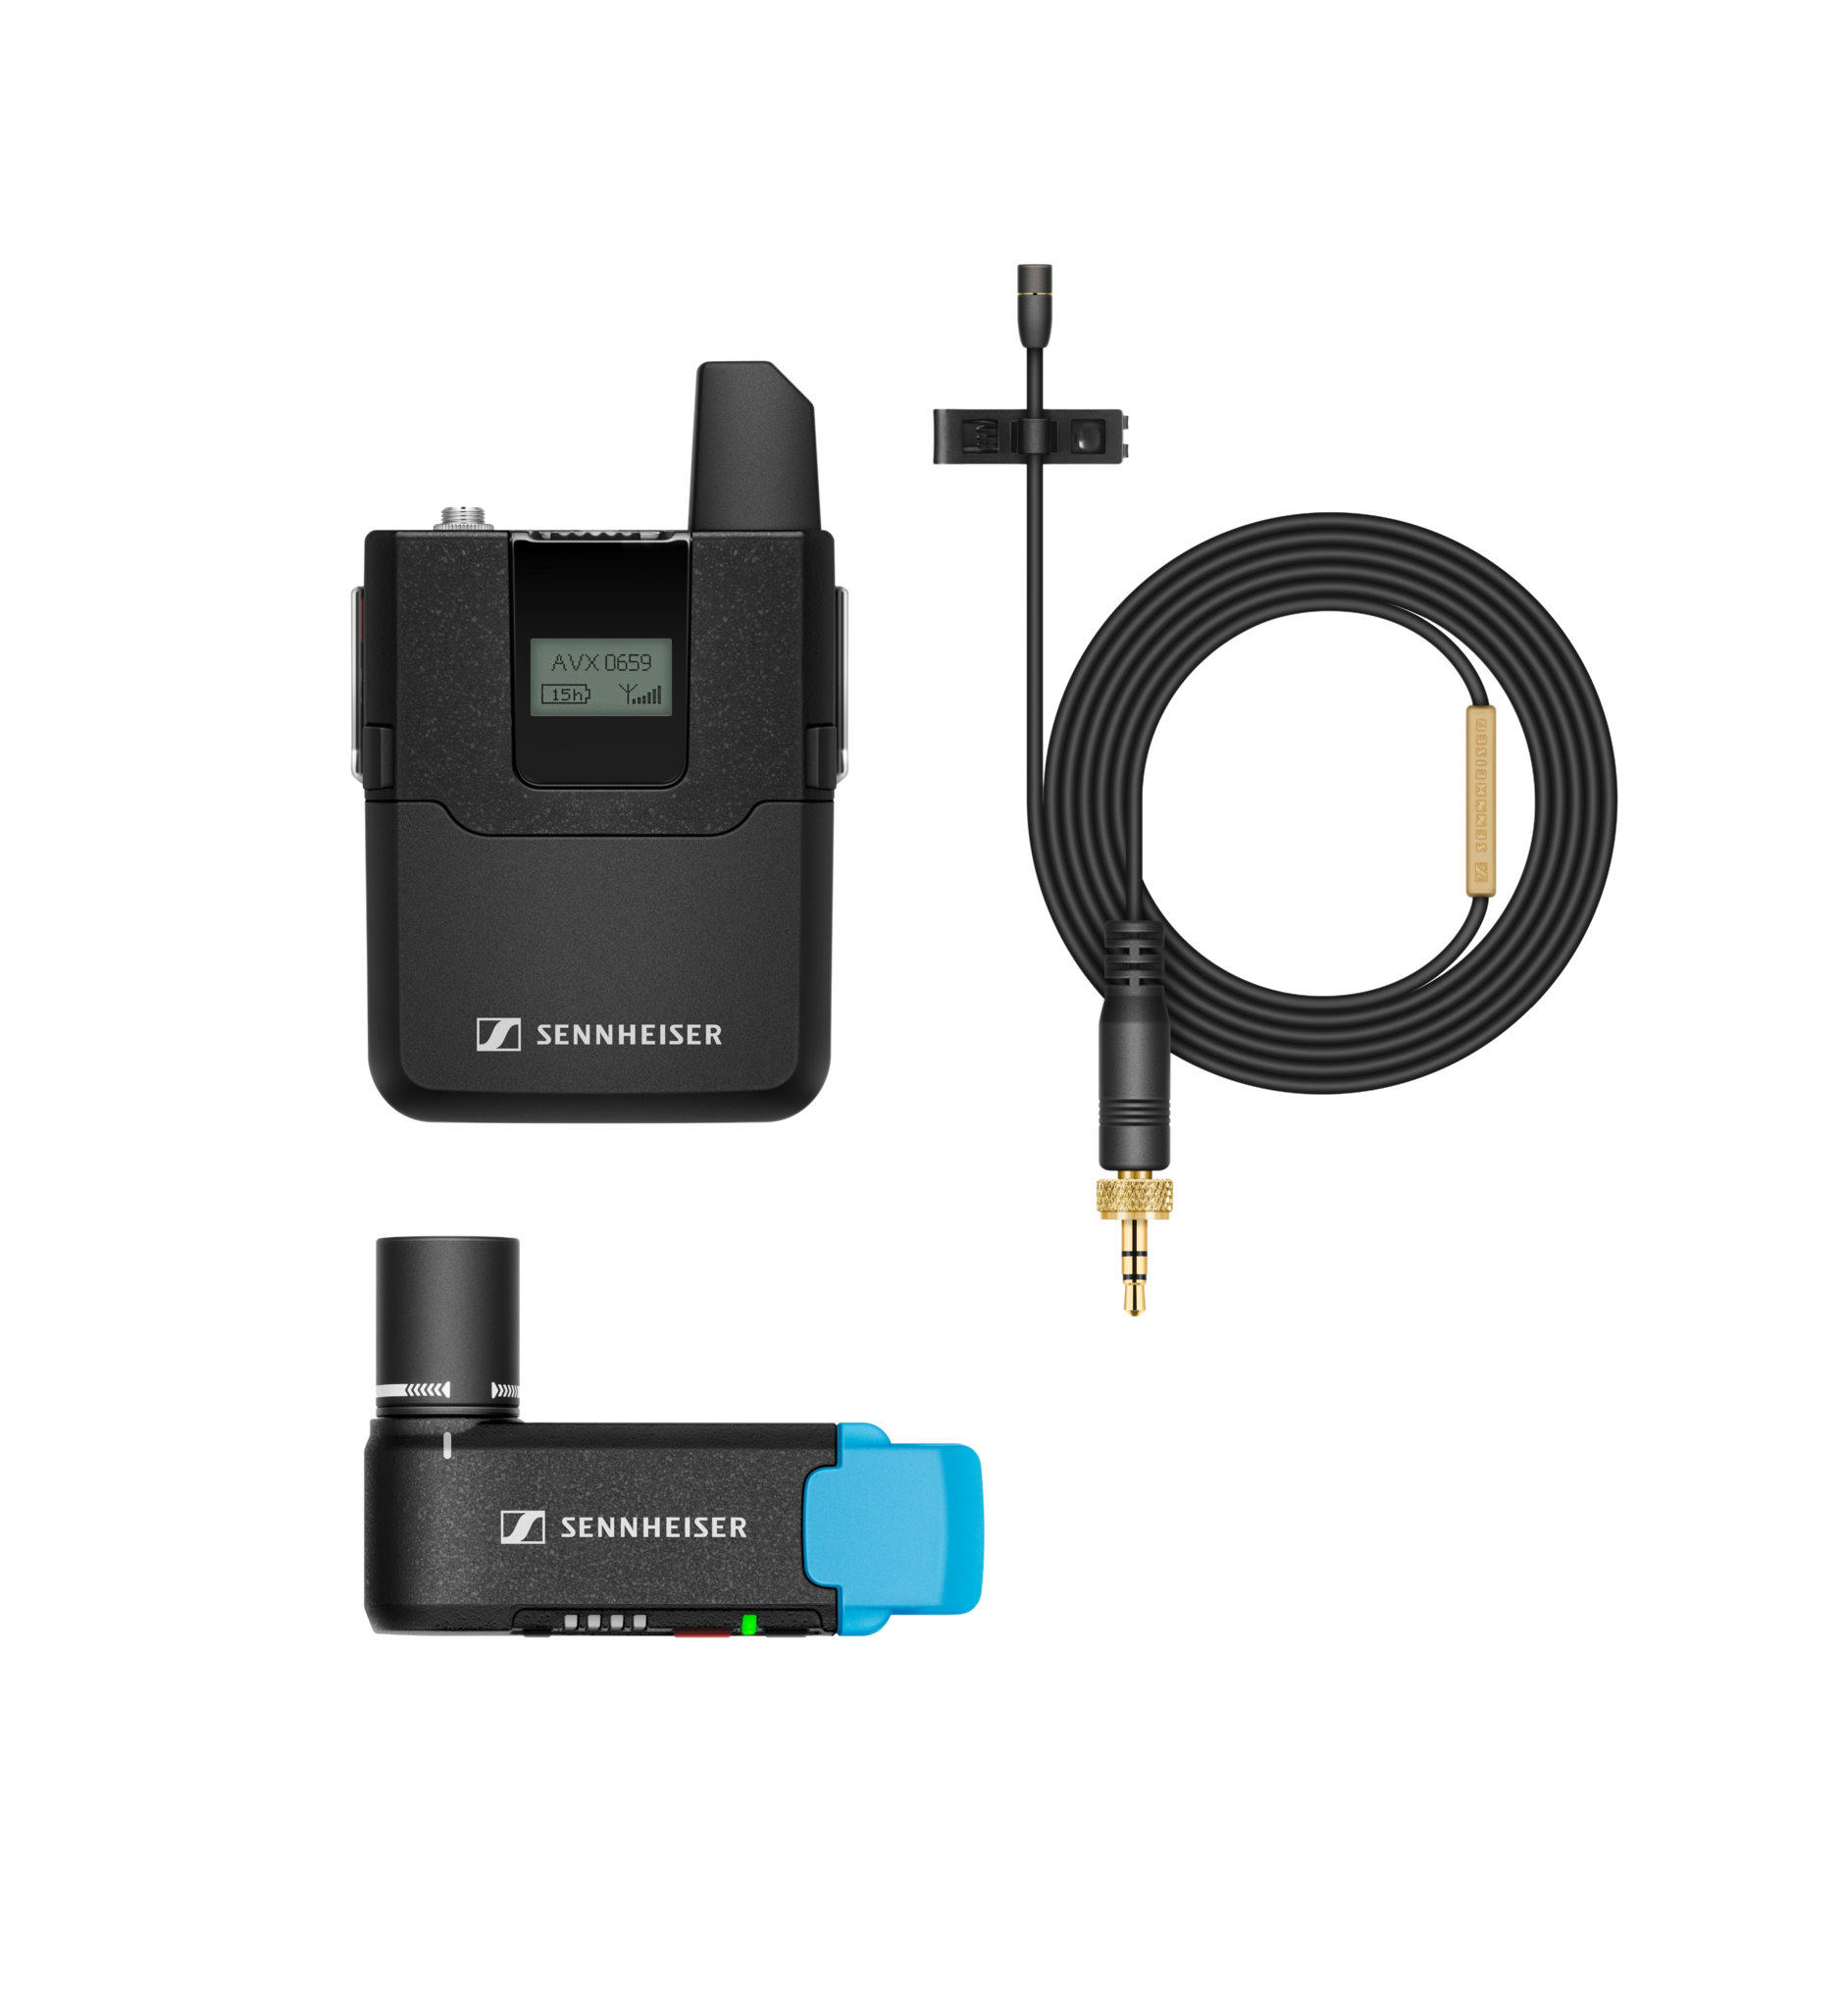
3. Sennheiser AVX-MKE2


 AVX_MKE2_Set_Lavalier_Set_product_shot_cutout_RGB.png


The Sennheiser AVX-MKE2 has professional-level sound quality, perfect for beginners looking to invest in their craft. It's a wireless system that pairs effortlessly with cameras and offers crystal-clear audio transmission. 


Advantages:

Superior sound quality, easy to use with automatic sensitivity adjustment and a rugged design built for durability.


Disadvantages:

Higher price points might be a significant investment for beginners. 


4. Tascam DR-10L


Unlike the other options listed, the Tascam DR-10L is both a lav mic and a portable recorder. It captures high-quality audio without the need for an external recording device, which is especially handy for videographers who prefer post-production flexibility.


Advantages:

Excellent sound quality, built-in recording capabilities, and compact size for discreet use.


Disadvantages:

The learning curve is due to additional recording features and higher price points than more straightforward, lavalier mics. 


Making the Right Choice

Choosing the right lav mic depends on various factors, including your budget, the devices you intend to use it with, and the level of sound quality you're looking for. Whether you decide on an entry-level model like the BOYA BY-M1 or a more professional setup like the Sennheiser AVX-MKE2, enhancing your audio game is a surefire way to improve your videography projects.

Tuesday, January 9, 2024

Top Mirrorless Cameras Under $1,000 for Videography in 2024


Finding the right camera that strikes a balance between performance and affordability can be a challenging task. For those seeking quality within a budget, our list narrows down the options to mirrorless cameras priced under $1,000, each meeting specific criteria to cater to the needs of videographers.

To earn a spot on our list, cameras were evaluated based on key features such as a list price without discounts of less than $1,000 with an included lens, interchangeable lenses, 4K video recording at a frame rate of at least 24 frames per second, and a dedicated microphone input. While each camera in this range has its own set of tradeoffs, this guide aims to assist you in selecting the one that aligns best with your unique videography requirements.

Let's delve into the details of some noteworthy contenders on our list, examining their strengths, weaknesses, and standout features. Whether you prioritize autofocus, low-light performance, or external recording options, this guide provides valuable insights to help you make an informed decision for your videography needs in 2024.

Sony A6400 with 16-50 mm Lens


The Sony A6400, though the oldest model among our under-$1,000 selections, continues to deliver outstanding videography results in 2024. Launched in February 2019, this camera boasts the ability to record 4K video at 30 frames per second without time constraints, though extended shooting may trigger overheating concerns. Featuring an S-Log video mode for color grading, the A6400 is constrained by its 8-bit 4:2:0 format for intense color grading. While its 4K video bitrate peaks at 100 Mbps, the A6400 ensures sharp, high-quality 4K video through oversampling, utilizing the entire sensor area rather than cropping. Noteworthy is its exceptional autofocus functionality within this price range.

On the flip side, the A6400 lacks image stabilization, resulting in shaky handheld footage when compared to cameras with a combination of in-body and optical image stabilization. Another drawback is the pronounced rolling shutter effect during rapid panning and movement, more noticeable than its counterparts in this category.

[BUY ON AMAZON

Video Samples:

Fujifilm X-T30 II with XC15-45 mm Lens


The Fujifilm X-T30 II emerges as a compelling mirrorless camera option under $1,000, an upgraded iteration of its predecessor. With extended video recording limits at 4K and 1080p, it captures video at 200 Mbps in 4:2:0 with 8-bit color internally, extendable to 4:2:2 10-bit color using an external recorder via HDMI output. However, this external recorder adds cost, potentially encroaching into the budget of other cameras offering internal recording in this format.

The X-T30 II introduces slow-motion recording at 120 frames per second in 1080p, albeit with sensor cropping for improved performance. Notable features include Log F recording mode for optimal color grading and improved autofocus with AI-powered face and eye detection. Despite lacking in-body image stabilization, optical stabilization options are available. Regrettably, the X-T30 II is not the ideal choice for vlogging due to a non-articulating digital display and limited lens options compared to rival platforms.

[BUY ON AMAZON]

Panasonic LUMIX G95 with 12-60 mm Lens


Praised as one of the best sub-$1,000 cameras for videographers, the Panasonic Lumix G95 offers 4K video recording at 30 frames per second, presenting an 8-bit color depth and 4:2:0 sampling internally. Notably, it supports 4:2:2 sampling with an external video capture device. Boasting V-Log L mode for flexible color grading, this camera distinguishes itself with unlimited recording time, making it suitable for capturing prolonged performances and interviews, and doesn’t seem to run into the same overheating issues as many others in this category.

Despite its strengths, the G95 lags behind competitors in autofocus performance, occasionally encountering tracking issues during video recording. A notable drawback is the use of cropping during video capture, limiting its sensor area and resulting in a zoomed-in, cropped image, adversely affecting low-light conditions and increasing noise in the video. While cropping aids in reducing processing power usage and minimizing overheating risks, it deviates from the approach of other manufacturers utilizing the entire sensor for 4K video capture.

[BUY ON AMAZON

Video Samples:

Canon EOS R50 with 18-45 mm Lens


As a recent addition to the sub-$1,000 mirrorless camera lineup, the Canon EOS R50 distinguishes itself by employing the entire sensor width for 4K video, delivering sharpness without a crop-effect. It features a 10-bit 4:2:2 color mode high dynamic range mode, although a Log mode is absent. Renowned for its autofocus capabilities, the EOS R50 utilizes AI-powered autofocus, particularly effective for human subjects. However, its stated recording limit of 1 hour can encounter overheating issues before reaching that threshold.

Similar to its peers, the EOS R50 lacks in-body image stabilization, posing challenges for handheld video shots. With a compact design and a side-flipping display, it emerges as a suitable option for vlogging, complemented by its excellent autofocus. While initial lens availability was a concern, the situation has improved over time, offering more choices for users within a budget.

[BUY ON AMAZON]

Video Samples:


Things to Look For When Choosing a Videography Camera:

1. Video Recording Capabilities: Elevating your videography requires a camera that excels in video recording capabilities. Look for mirrorless cameras that boast the ability to shoot in 4K resolution, ensuring your footage is not only crystal clear but also possesses the cinematic quality essential for professional-looking videos. Aim for a minimum frame rate of 24 frames per second (fps) to guarantee smooth and visually appealing motion.

2. Recording Time Limitations and Overheating Considerations: Delve into the recording time limitations imposed by different mirrorless cameras, with special attention to overheating concerns. Especially if your videography ventures involve events, interviews, or performances that demand extended shooting durations, it's crucial to select a camera with generous or unlimited recording time. Overheating can become a limiting factor during prolonged sessions, impacting both the camera's performance and the continuity of your recording. Understanding the camera's thermal management capabilities is essential to ensuring seamless recording without interruptions during critical moments.

3. Bitrate and Color Depth: The quality of your video footage is significantly influenced by the bitrate and color depth of your chosen camera. Opt for a camera with higher bitrates, such as 100 Mbps or more, to capture intricate details and manage motion with finesse. Additionally, a broader color depth, such as 10-bit, provides more room for post-production color grading, enhancing the overall visual allure of your videos.

4. Autofocus Performance: Achieving smooth and reliable autofocus is paramount for capturing dynamic video content. Look for mirrorless cameras equipped with advanced autofocus features, including robust face and eye detection capabilities. This ensures that your subjects remain sharply focused, even in challenging shooting conditions, delivering professional-quality videos.

5. Image Stabilization: Effective stabilization is a cornerstone for shooting handheld video footage. While some mirrorless cameras offer in-body image stabilization (IBIS), others rely on optical stabilization present in specific lenses. Consider your shooting style and choose a camera with stabilization features that align with your needs, minimizing shaky footage and enhancing overall video quality.

6. Low-Light Performance: Videography often involves shooting in diverse lighting conditions. A mirrorless camera with exceptional low-light performance ensures that you can capture clear and detailed footage, even in challenging environments. Look for cameras with larger sensor sizes, as this generally enhances sensitivity in low-light situations.

7. External Recording Options: For seasoned videographers seeking advanced capabilities, the ability to record externally in higher bitrates or different formats is crucial. Check if the camera has an HDMI output for external recording and whether it supports advanced recording formats like 4:2:2 10-bit color. These features provide additional flexibility in post-production and advanced videography techniques.

8. Display and Articulation: Consider the camera's display features, including articulation. A fully articulating screen is advantageous for vlogging and capturing creative angles. Ensure that the display is bright and clear for easy framing and composition, particularly when shooting outdoors. A well-designed display contributes to a more intuitive and enjoyable videography experience.

9. Rolling Shutter Effect: The rolling shutter effect can be a potential concern, causing distortion during fast motion or panning. Choose cameras with minimized rolling shutter effects to ensure smooth video capture without unwanted artifacts, preserving the integrity of your footage.

10. Lens Compatibility and Availability: Explore the lens ecosystem of your chosen camera system, considering both compatibility and availability within your budget. A diverse array of lenses suitable for videography, offering various focal lengths and features, provides you with the flexibility to expand your creative options over time. Ensure that the camera system you select has a robust and evolving lens lineup.


Which of the following cameras is your favorite in the less than $1,000 range? Let us known in the comments.


Friday, February 23, 2018

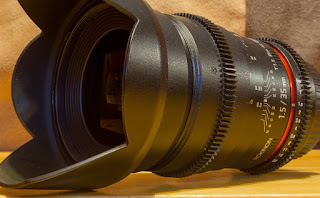
Rokinon 35mm T1.5 Cine Lens Review

After searching for months for the next lens upgrade for YouTube, I eventually decided on the Rokinon 35mm T1.5 Cine lens. Though I had initially considered using a 50mm f1.8 (nifty fifty), the small focus ring and poor build quality of those lenses turned me off. Also, since I'm using an APS-C sensor camera, the 35mm field of view was a lot more useful for product reviews. This lens has now become my most used camera lens and I definitely recommend it for anyone who needs a high quality prime lens without much cost.


Image Quality

The image quality from this lens is very sharp, but starts to soften when opened to T1.5. This is typical of most lenses, and I find the best balance between depth of field, sharpness, and low light performance on this lens is at around T2.8, so that's where I typically use it.

As for chromatic aberration, there was a little bit of fringing at T1.5 in high contrast (black on white) areas, but this happens on a lot of lenses. It was a little more pronounced when the image was slightly out of focus as well, and could be seen even in video mode. When stopped down to T2.8, this pretty much completely went away.

Focus

Focusing with the Rokinon 35mm cine lens is completely manual, with no focus confirmation. I actually prefer this for video. The ring has a large focus throw, allowing for very accurate focus pulling. I haven't even had an issue pulling focus on the small camera LCD, but for more accurate focus using a cheap external monitor can help. This is especially important if you plan on shooting at 4K or higher resolution.

The overall experience with focusing the lens is really good. The focus ring is very smooth to turn and has just enough stiffness to it. The smoothness also helps when pulling focus by hand instead of with a follow focus, since there isn't really any shake added. I did buy this lens with the long term goal of eventually adding a follow focus, but it definitely is good on it's own so that's not entirely necessary. If I did decide to in the future, the focus ring has a gear for a follow focus built in, so there's no need for those ugly add on gears.

Another important feature of the focus ring are the distance indicators. This ranges from 0.3 m to just past infinity and makes focusing a lot easier. There are also indicators that show the range of focus at certain aperture. The largest depth of field being at T22, which allows everything to be in focus from 1m to infinity. This is especially helpful at night when talking long exposure shots since the low light and added noise can make manually focusing with the camera display very difficult.

The one concern with this lens is there is a considerable amount of focus breathing. Basically this means that the focal length changes slightly as you adjust the focus of the lens, and this can change your framing slightly. If considered when framing the shot, it's not too big of an issue, but it is something that can catch you off guard if pulling focus and not accounting for it.

Aperture

The aperture ring on this lens is completely manual. Aperture ranges from T1.5 (equivalent to F1.4 on the non-cine lens) to F22. The best part about the aperture on this lens is that it's declicked. This means that the aperture doesn't click to preset points (f1.8, 2.8, etc) like the photography version. The aperture can be set anywhere in between. Declicked aperture is really helpful for getting perfect exposure in video mode, since you usually can't change the shutter speed and the only other option is the ISO. Since ISO changes in discrete steps, you'll get steps in the changes of light, not allowing you to set it in between without other tools like ND filters.

A declicked aperture can also allow you to quickly change the amount of light entering the camera while recording and you'll get a smooth transition. This helps when light conditions change quickly, like when moving the camera from an indoor shot to outdoors without stopping. This can also be done with variable ND filters, but they have limitations and can degrade the image quality. That isn't to say there aren't problems with changing the aperture like this, since you're also affecting your depth of field at the same time.

The aperture ring quality feels similar to the focus ring and is very smooth, though much smaller. My one complaint about this is how close the ring is to the body, since it can be difficult to access on some camera rigs. Like the focus ring, the aperture ring is also geared.

Without electronic communication between the lens and camera, there's no control of the aperture with the normal buttons. Your camera also won't save information about the lens focal length and aperture like it does with normal lenses. Since we're talking about this lens from a video perspective, this isn't much of an issue. It is definitely something to consider for photographers though, since it makes it more difficult to apply a lens profile when correcting for issues like chromatic aberration. Without aperture information, it's also difficult to judge the exposure when shooting in manual mode for stills since the exposure on the screen doesn't match the image well. This isn't a problem for video mode.

In some cases, having a manual lens like this is actually a huge advantage. I was looking for a way to get close up shots of some products I was review a while back. After looking at macro lenses, I just couldn't justify the price for the few shots I would be using it for. Instead, I decided to use extension tubes. Since the lens is completely manual, I was able to get cheap Fotodiox extension tubes without any electronics, full article on that here.

The Rokinon 35mm lens has 8 aperture blades inside, compared to some cheaper lenses which may only have 5 or 6. This allows for much rounded bokeh when stopped down, since the shape of lights becomes octagonal instead of pentagonal or hexagonal.

Build Quality

This Rokinon lens is mostly a hard, durable plastic, but it does have a metal camera mount. The lens is fairly heavy, but not to the point where it's hard to use or requires lens support. The only time I would recommend using lens support is if you're using extension tubes since the added distance increases the torque on the lens mount at the camera. This can also be a bit of an issue on some cameras if you choose to adapt the lens, since the weight is placed further out from the body.

This extra weight of the lens actually helps to make up for the lack of image stabilization. The heavier rig experiences quite a bit less jitter. It actually find handheld footage with this lens more usable than my kit lens with stabilization at the same focal length.

Unlike some other Rokinon lenses such as the 14mm, this lens can take a standard 77mm lens cap. This is super helpful since it's very difficult to replace missing lens caps on those Rokinon lenses. Additionally, it has a removable lens hood. I've found it can get in the way, especially with extension tubes. The lens hood is fairly flimsy plastic, so I would be careful not to break it. Luckily if it breaks, it does come off, unlike the other lenses which are stuck with a busted hood.

Mount Options

This lens has a few different versions that are compatible with Canon EF, Sony E-mount, Micro Four Thirds, and Nikon. My recommendation is to get a Canon EF version if there is a compatible adapter available. Since the lens has no electronic communications, you're not really loosing any functionality. The advantage is the Canon EF mount versions are more widely available on the used market, and they tend to hold their value better.

Cine DS Version

For those who may be wondering about the Rokinon Cine DS version of this lens, they are fairly similar, but with a few improvements. The new lenses do have an updated coating on the glass which slightly improves color and image quality. They also standardized the position of the focus and aperture gears across all their lenses, making it easier to switch between them if you have a large rig. For me, this wasn't worth the additional cost.


Overall this lens is a good alternative to the Canon 35mm f1.4, at only a fraction of the price. I wouldn't recommend it for professional photographers, since autofocus and electronic lens communication is definitely important, but it's great for video. This is a great lens for anyone looking for a sharp prime lens to get into video work, especially if planning on using manual focus only.

Monday, February 19, 2018

Fotodiox Extension Tubes - Macro Photography and Video for Cheap


One of the cheapest ways to get close up photographs and videos is by using a set of extension tubes. Though they may not be as easy to use as a dedicated macro lens, they are definitely a lot cheaper, at usually under $50 for a Canon EF set. Not all extension tubes are created equal, and some also have built in electronics to allow control of the lens’ electronic aperture. In this case, I chose to use the Fotodiox extension tubes without electronics for my fully manual Rokinon 35mm T1.5 cine lens. These are some of the cheapest extension tubes available, since they only act as a physical connection between the lens and camera.

With these extension tubes, there are a few different options. The set comes in 5 pieces. There is a piece to connect to the lens, one to the camera, and three extension tubes that can be placed in between. The extension tubes lengths are 7mm, 14mm, and 28mm. All of them are connected together by threads, and they can be connected in any order as long as the lens and camera connections are at either end.  I usually don’t use the extension tubes in between, since the decrease in focus distance by the adapters themselves leaves me with enough magnification.

The extension tubes themselves feel very secure and I don’t feel like I’m risking breaking the camera when using them. Since they’re threaded, there’s really no chance of the tubes coming apart in the middle. They also attach to the camera just as securely as any other lens. The attachment for the lens at the front also has a small pin that prevents the lens from coming loose.

My only concern when using these extension tubes is the weight of the lens. With the increased distance from the lens to the camera mount, there’s a lot more torque on the camera, and this can cause damage. This is especially an issue with the heavy Rokinon cine lenses, and it’s part of the reason I only use the extension tubes at their shortest length. With lightweight lenses, it’s not as much of an issue. One solution to this problem could be to use a rail system with a lens support and that may be something I do in the future.

When using extension tubes, I recommend keeping a UV filter on your lens. Since the extension tubes decrease the minimum focusing distance, the front lens element will be really close to the object you’re trying to take an image of. Accidents do happen, and a UV filter can prevent an unintentional bump from scratching the front of your lens.

It’s also helpful to have a proper lighting setup with these extension tubes. Since the front element is so close to the subject, it tends to block a lot of light. When taking stills, this can be accounted for by using a tripod and a longer exposure, but it’s quite a bit more of a challenge for any video work. This may not be an issue for every lens, but the front filter size on my Rokinon lens is 77mm, so it blocks a lot of light.

Since the Fotodiox extension tubes are such a cheap option, they don’t come with any electrical contacts. That means you won’t be able to adjust the aperture or using autofocus with the lens. In my case, I’m using a fully manual lens so this isn’t an issue. If you primarily use electronically controlled lenses, it might be worthwhile to get a proper set of extension tubes with electrical contacts.

One of the main concerns I have with this setup, is that the inside of the tubes is a glossy black paint. Some people may find they have issues with lens flares due to the lack of coating, but I typically use it for product shots indoors.

Here are some example photos using the Fotodiox extension tubes. These photos are taken on a Canon APS-C sensor with the Rokinon 35mm T1.5 cine lens. All images are taken at the minimum focusing distance, at about T18 since the depth of field is very shallow on these shots. None of the images were cropped, so you can see what the size of the full image is.

  1. Rokinon 35mm Cine, No extension tubes.
  2. Rokinon 35mm Cine + Extension tube adapters only
  3. Rokinon 35mm Cine + 7mm Extension tubes
  4. Rokinon 35mm Cine + 7 + 14mm Extension tubes
  5. Rokinon 35mm Cine + 7 + 28mm Extension tubes

I stopped at this point. If using all three extension tubes together, there was no way to focus the lens since the focusing distance was too close. I was also getting a lot of issues with lens flares.

Keep in mind that it can be very difficult to take pictures at this kind of magnification. You will need to use a long exposure with a tripod, and any shake is very noticeable. Even on a tripod, I was forced to use a timer to prevent the camera from shaking.